
 Image 1 of 4
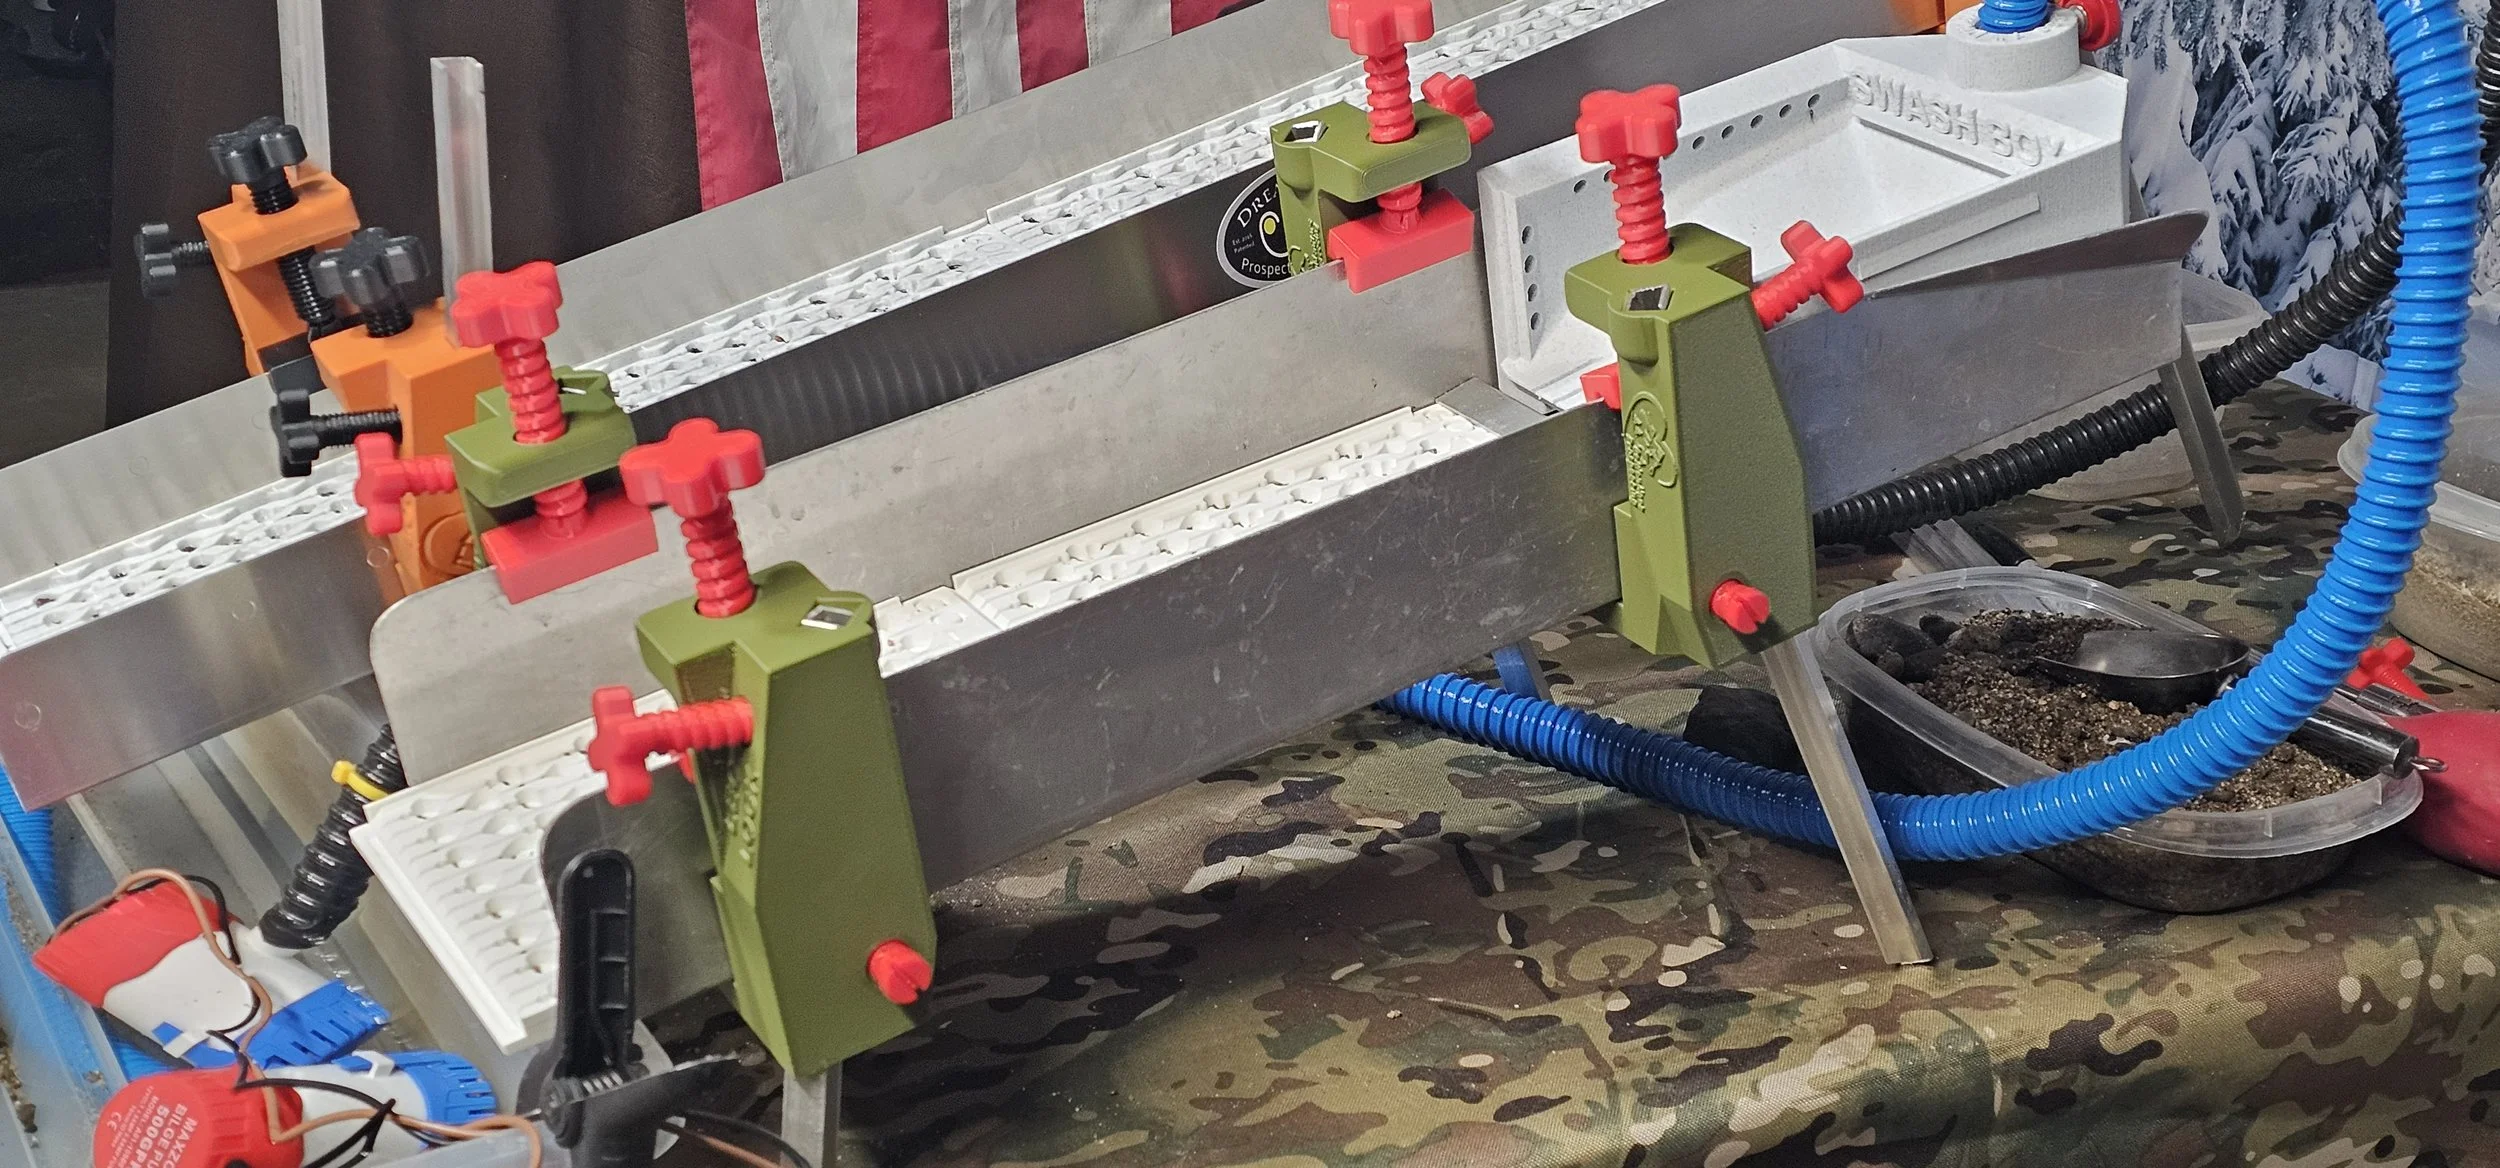 Image 2 of 4
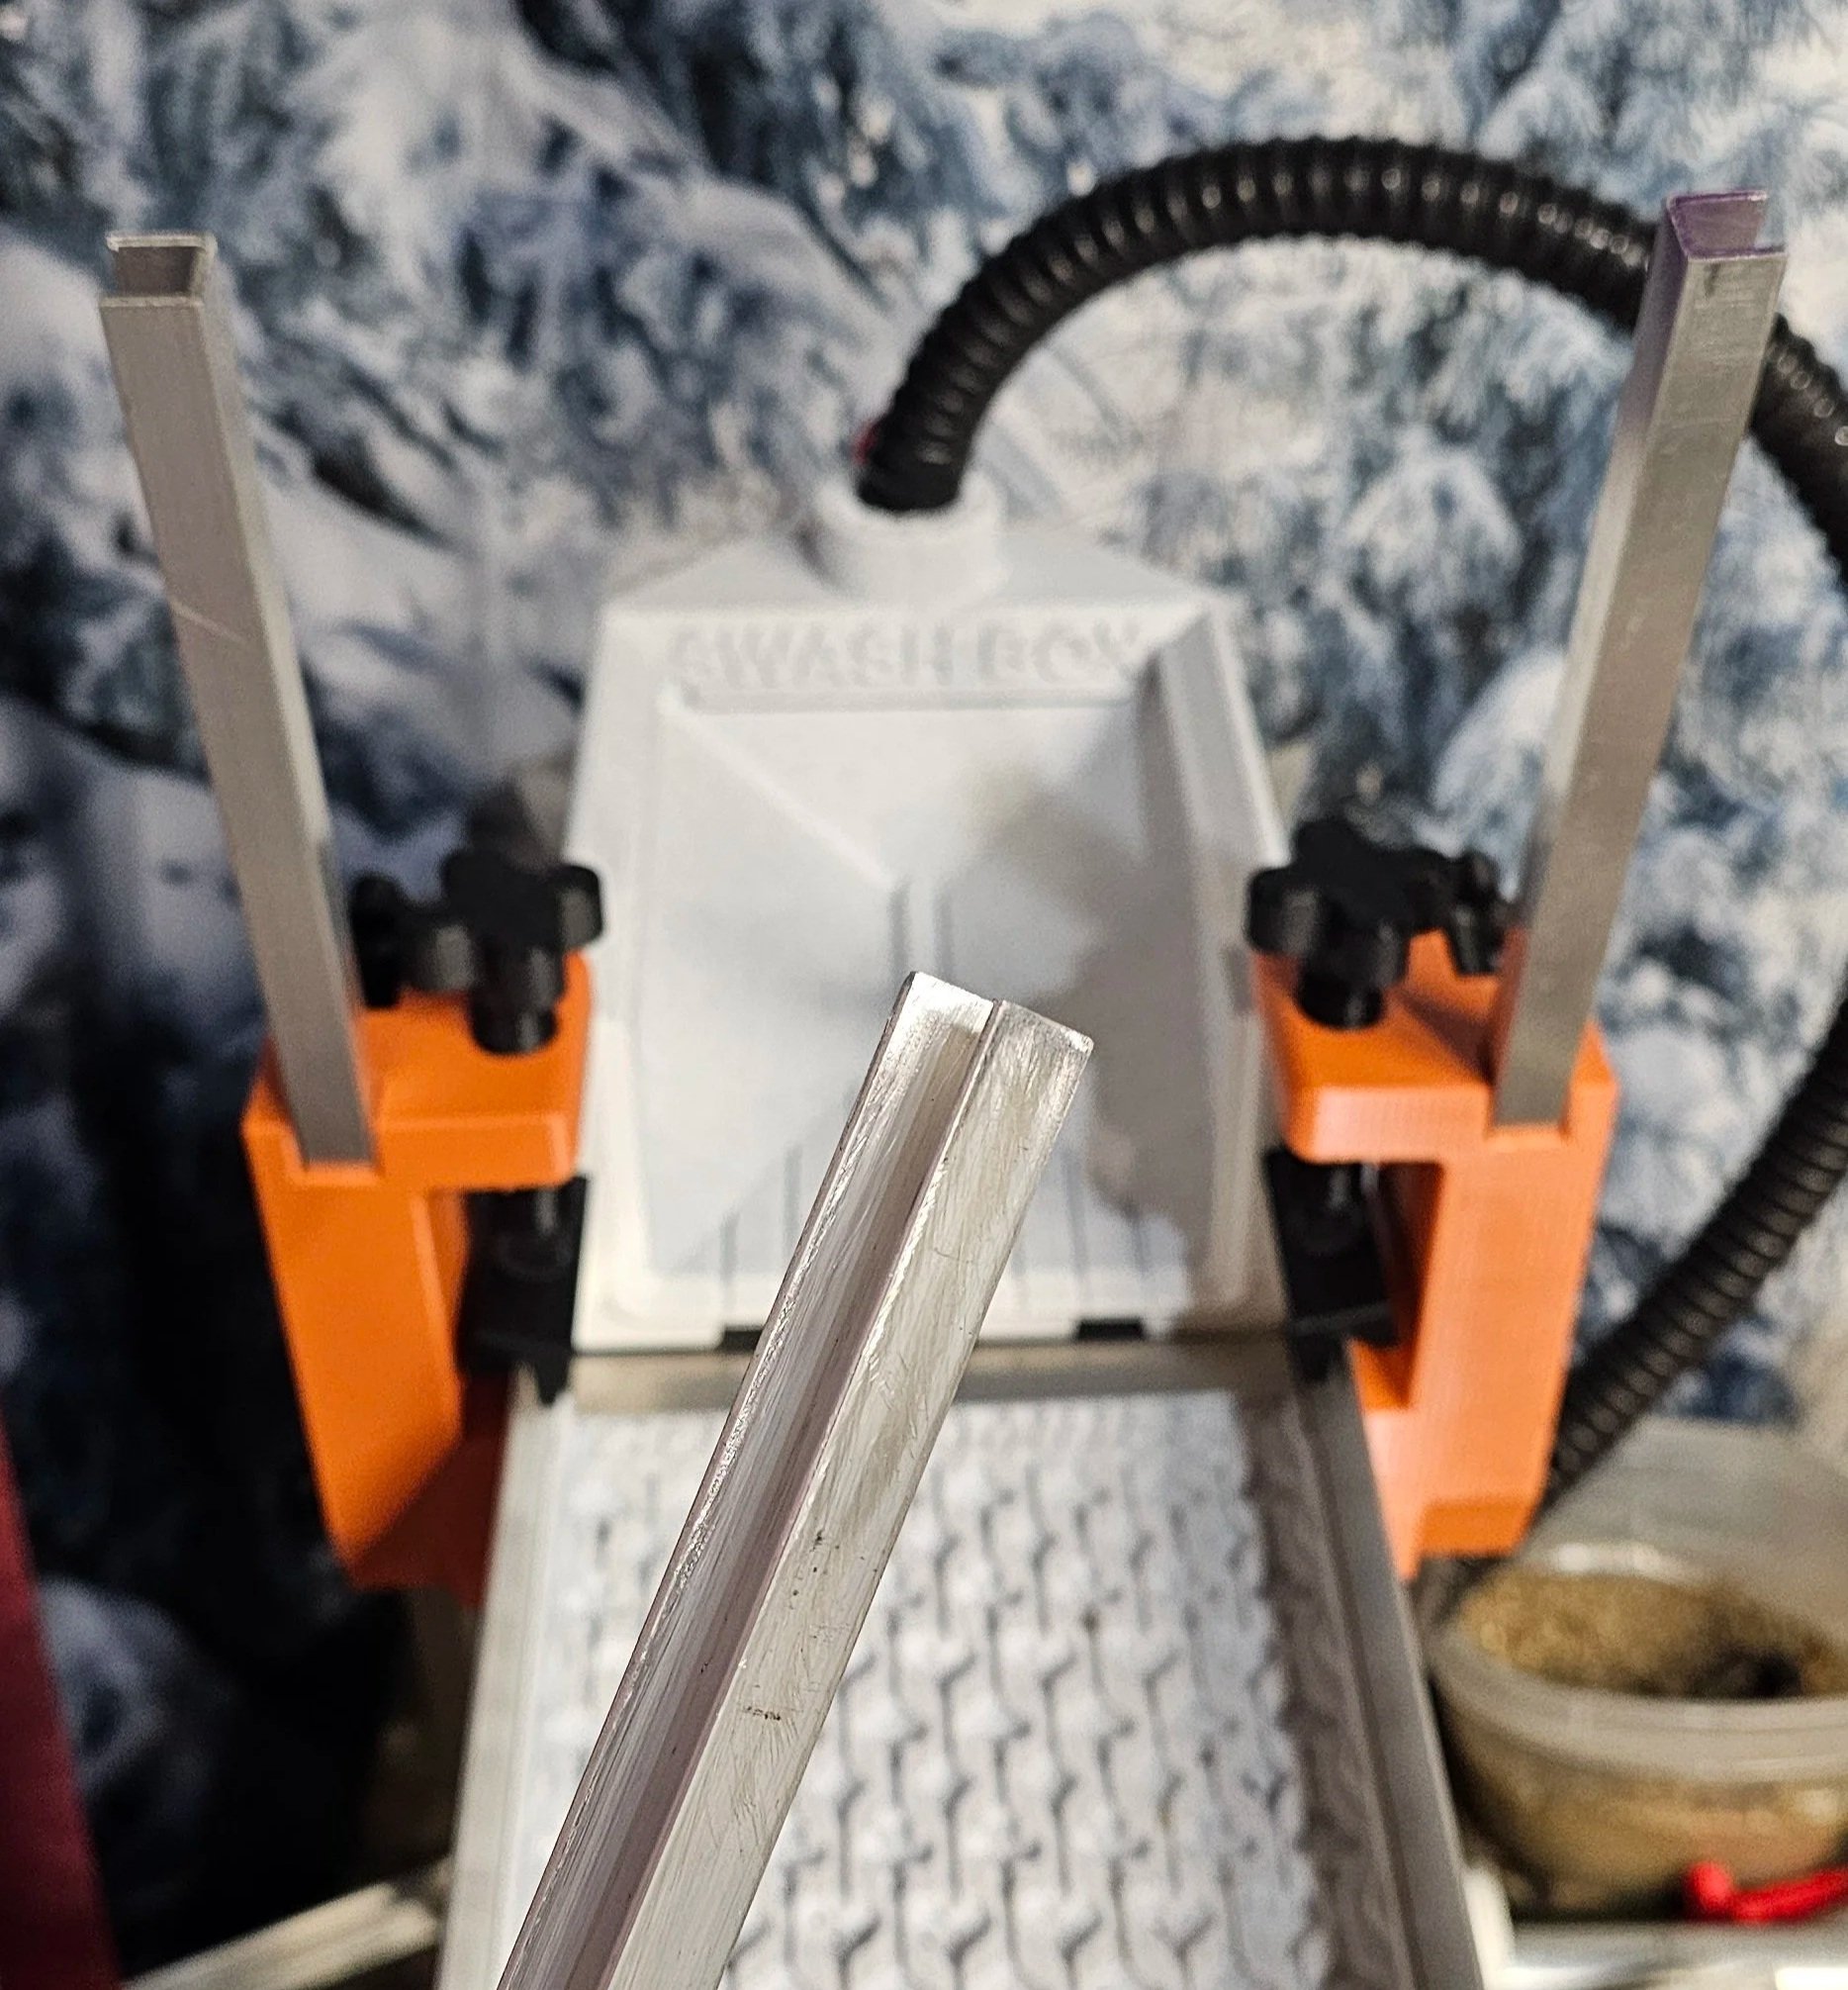 Image 3 of 4
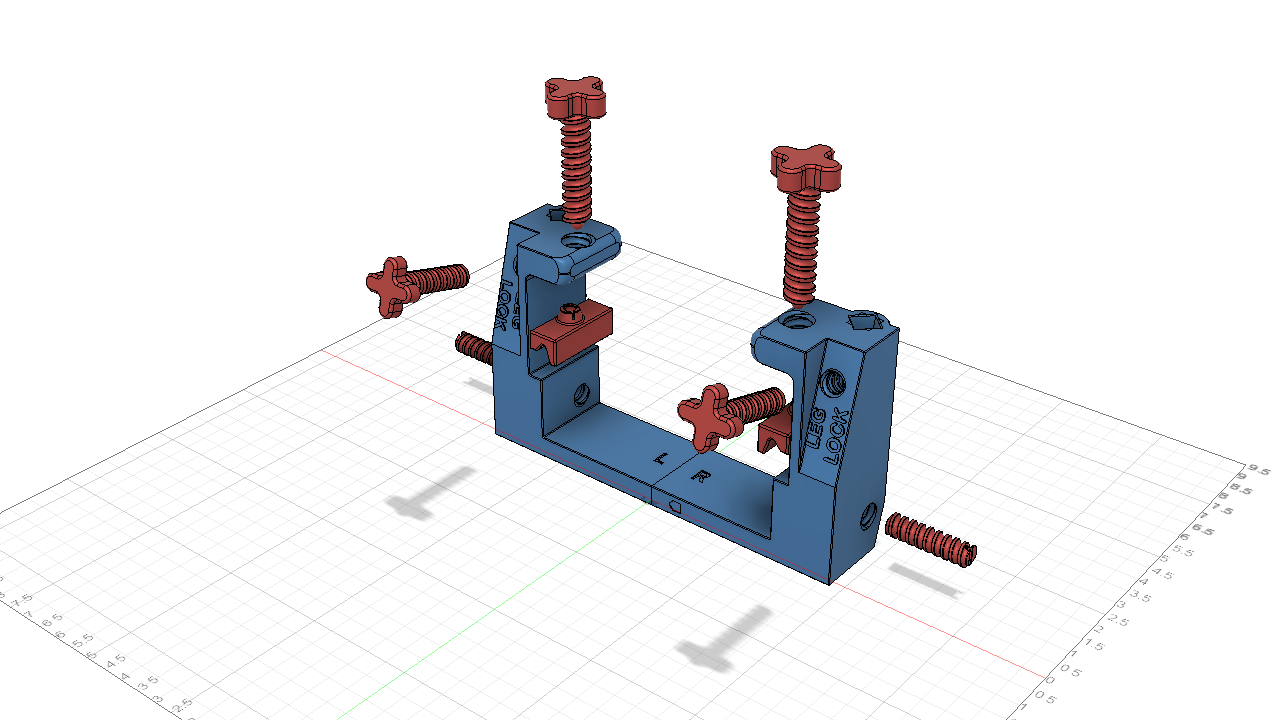 Image 4 of 4
Note: Uploaded 2-24-26, Rev4F
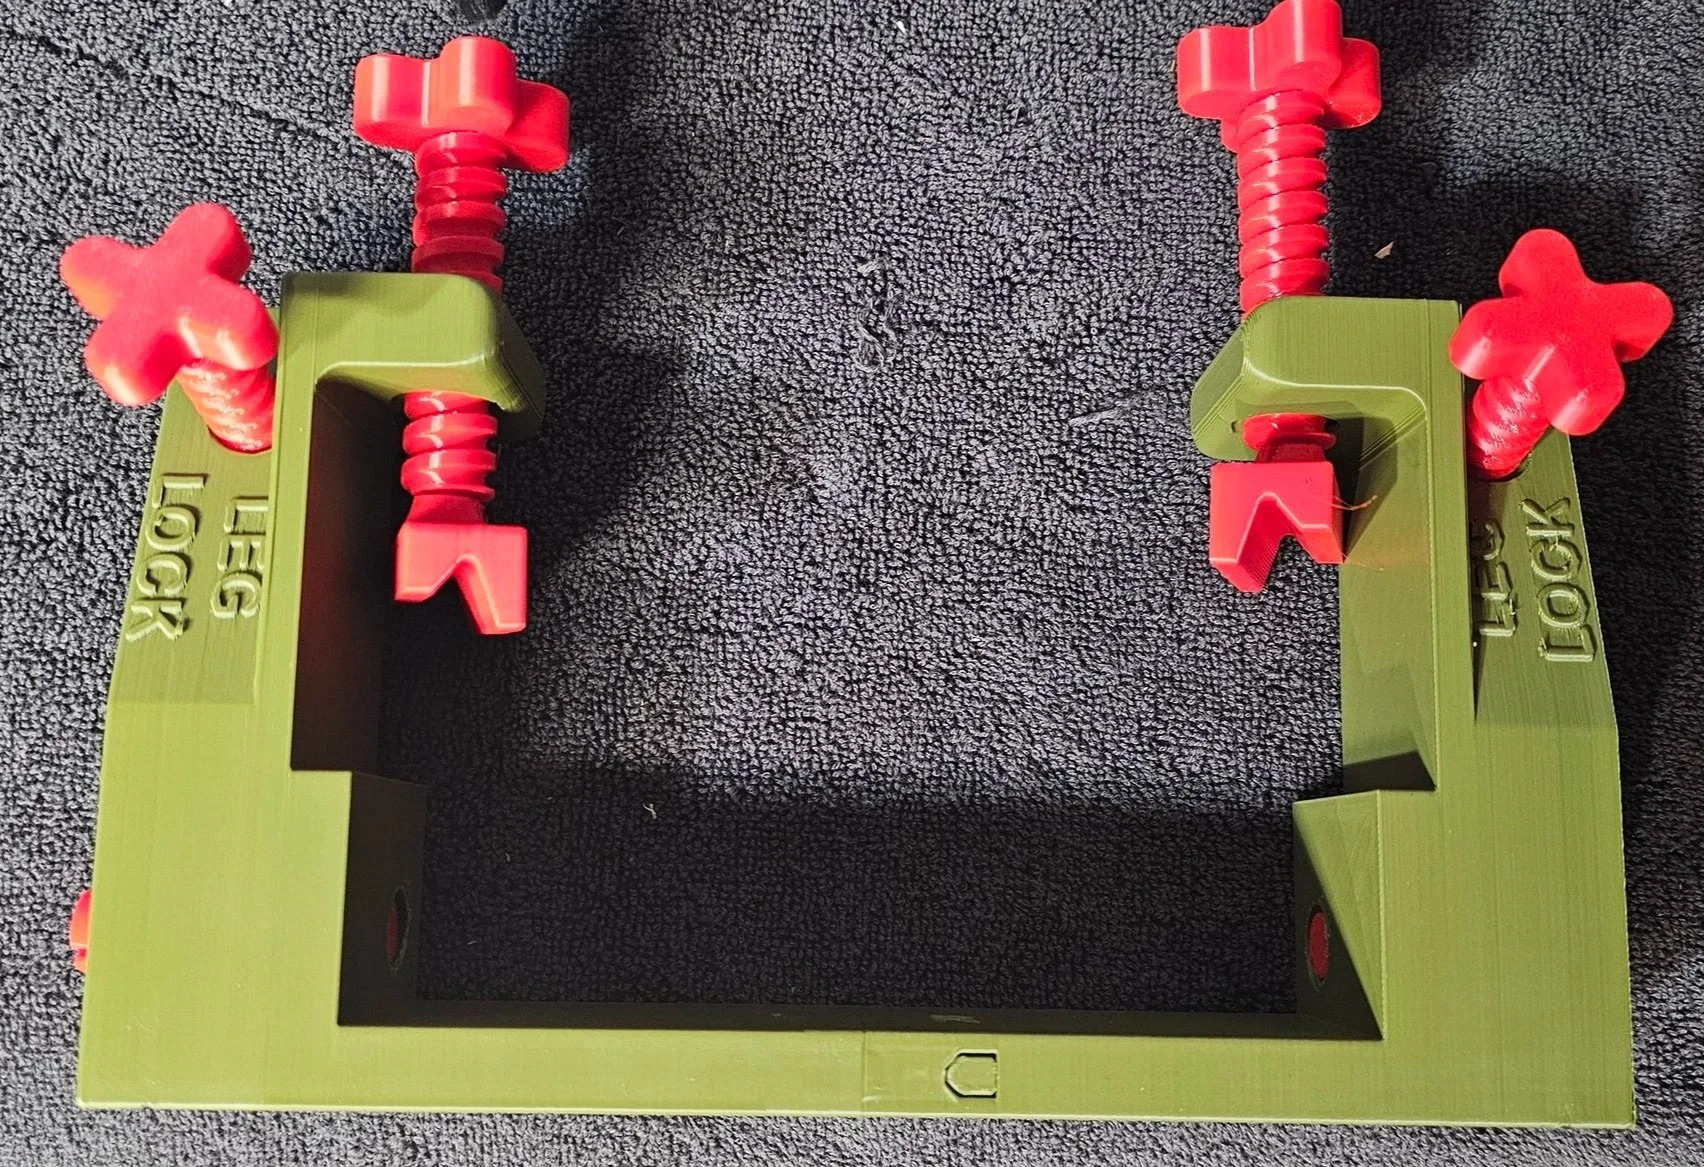
This is a sluice leg assembly (minus the ½ leg material) designed to fit sluices from 6” to 6 1/4” wide and 1 3/4” to 3 1/2” tall. This kit should be able to use any material 1/2” or smaller that you provide for the “legs”. As I mention in my videos I designed this kit to mainly use “3/8” plywood end channel” (OD measures 1/2” sq) that you can find in hardware stores or the cheapest I found is an 8 ft piece at Home Depot (Internet # 332734297 model#6536 Store SKU # 269210)
Recommendation: Print with PETG or ABS/ASA, mounts can be min 4 wall thickness with 10 or 15% infill. Screws should be min 5 or 6 wall thickness with 10-15% infill. If the Mounts are printed with the side that has the “width adjustment screw holes” down on the build plate you will only need supports under the “leg lock” over hang section”
Refer to the Assembly model picture on how to put this together, once the big screws are screwed into the upper mount “easily snap” on the pivot blocks. Carefully snap the left mount into the right mount, if you’re too aggressive it may break the clip style fingers. Every screw should only need to be lightly tightened due to the “friction design”, never over tighten
Full pieces needed to print out for full sluice leg kit: 2 left mounts, 2 right mounts, 4 side set screws width adjustment, 4 leg lock screws, 4 Large top screws, 4 pivot blocks, and then you will need your leg material cut into 4 pieces (what ever length you see fit)
Note: Uploaded 2-24-26, Rev4F
This is a sluice leg assembly (minus the ½ leg material) designed to fit sluices from 6” to 6 1/4” wide and 1 3/4” to 3 1/2” tall. This kit should be able to use any material 1/2” or smaller that you provide for the “legs”. As I mention in my videos I designed this kit to mainly use “3/8” plywood end channel” (OD measures 1/2” sq) that you can find in hardware stores or the cheapest I found is an 8 ft piece at Home Depot (Internet # 332734297 model#6536 Store SKU # 269210)
Recommendation: Print with PETG or ABS/ASA, mounts can be min 4 wall thickness with 10 or 15% infill. Screws should be min 5 or 6 wall thickness with 10-15% infill. If the Mounts are printed with the side that has the “width adjustment screw holes” down on the build plate you will only need supports under the “leg lock” over hang section”
Refer to the Assembly model picture on how to put this together, once the big screws are screwed into the upper mount “easily snap” on the pivot blocks. Carefully snap the left mount into the right mount, if you’re too aggressive it may break the clip style fingers. Every screw should only need to be lightly tightened due to the “friction design”, never over tighten
Full pieces needed to print out for full sluice leg kit: 2 left mounts, 2 right mounts, 4 side set screws width adjustment, 4 leg lock screws, 4 Large top screws, 4 pivot blocks, and then you will need your leg material cut into 4 pieces (what ever length you see fit)